Inventor-U - Bot Staging Message - 13JUL24

In this session of Inventor University, we will go over how to make a Bot Staging Message then how to send that message into each server that is subscribed to receive your bot updates. We will also be learning how to use the Parse Color block as well as the difference between the Defer Interaction and Defer Component Interaction blocks and a basic introduction to loops

Minimum requirements

Inventor bot with:

  1. At least 3 free component spaces
  2. At least 50 unused storage crates

This is a multi-part tutorial, so you may need to click View the discussion on this topic below to see the full instructions.
What we learned in today’s lesson

  • Defer Interaction: Bot will respond within 15 minutes with any of the three Reply to Interaction blocks
  • Defer Component Interaction: Bot will respond within 15 minutes by updating the message the action was taken from (Button click will change the message the button was clicked from)

Setup

  1. Make a database with the rows of; server_id, channel_id. Or use an existing database if one exists
  2. Create a flow triggered by a message being sent
  3. Create a flow for listening to a button being pressed

Server configuration (Sending server)

  1. Make a channel to send the messages from
  2. Make a role to ping (or use the bot’s ID)

Message trigger flow

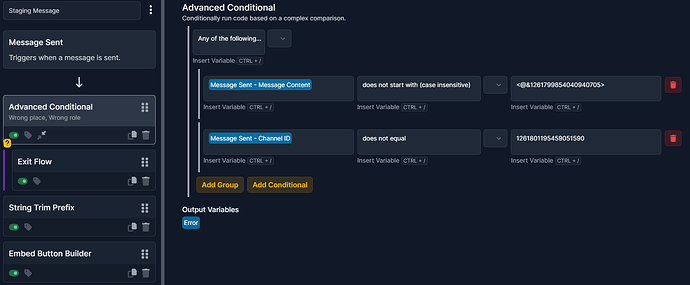
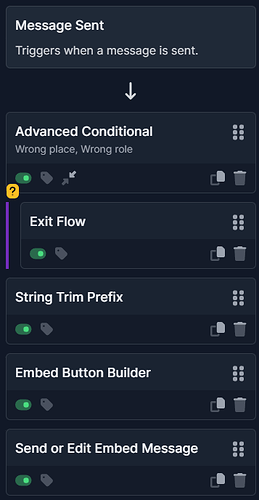
1) Use an “Advanced Conditional” set to “Any” and have the fields be; Message Content does not start with {role/user mention} and Message sent Channel ID does not equal {Staging channel ID}. Have an “Exit Flow” block inside
2) Use a “String Trim Prefix” block and set the “string” as the Message Sent - Message Content with the prefix being either the role or bot ping followed by a space
3) Add an “Embed Button Builder” to the flow, label it as “Send Message” and make the ID, “qwertyuiop*send
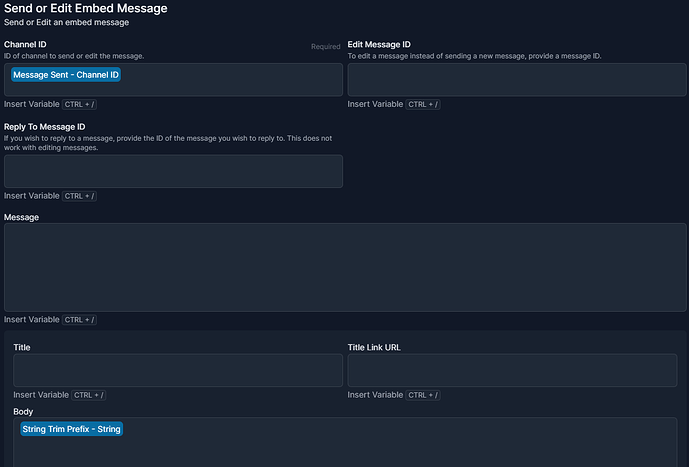
4) Add a “Send or Edit Embed Message” to the bottom of the flow, set the Channel ID as the Channel ID from the trigger, the Embed Body as the “String Trim Prefix - String” variable and the data from the “Embed Button Builder” in the Button Builder Data slot


Button Trigger Flow

1) Set the Button ID in the trigger as “qwertyuiop*” (make sure to include the asterisk as it is important later in the flow)
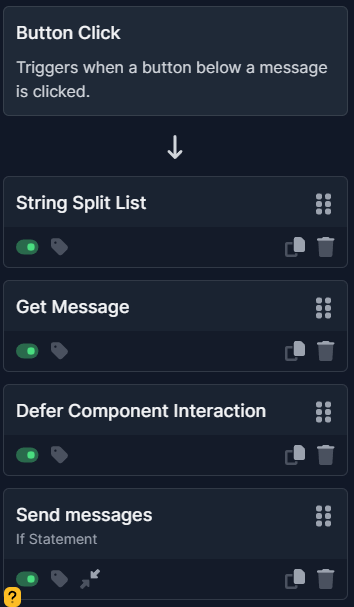
2) Add a “String Split List” block and set the “String” as the “Button Click - ID” with the separator being an asterisk (*)
3) Use a “Get Message” block so we can grab the content of the embed body as well as the Message’s Embed Color.
4) Add a “Defer Component Interaction” block to tell Discord the bot will respond by editing a previously sent message
5) Use an “if” statement to check if the second string in the “Split String List” block equals “send”. This next part will take place within the conditional
5.1) “Create Local Variable” block
5.2) “Get Rows” block
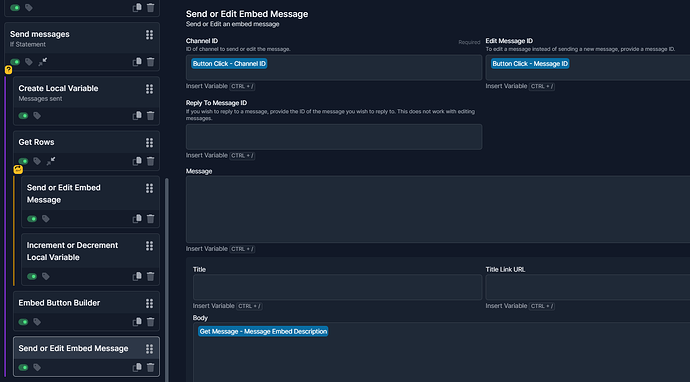
5.2.1) “Send or Edit Embed Message” block with the Channel ID from the “Get Rows” block and the Embed Body from the “Get Message” block
5.2.2) “Increment or Decrement Local Variable”. For the Variable, use the variable created in step 4.1 and increment the amount by 1
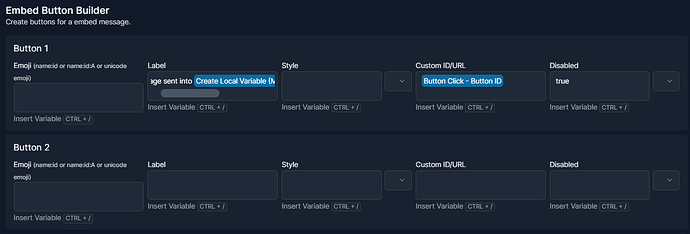
5.3) “Embed Button Builder” block. Set the Label to “Message sent into {variable from step 5.1} channels” and set the button as disabled
5.4) “Send or Edit Embed Message”. Make this block edit the message from which the button was pressed. Make sure to put the Message Embed Description variable from the Get Message block in the Embed Body, the Message Embed Color variable in the sidebar color slot and the data from the button builder in the Button Builder Data slot